Chat UI
The built-in Chat UI provides a browser-based interface for chatting with AI directly from within Producer Pal.
Getting Started
- Click "Open Chat UI" in the Device Interface Main tab (make sure the Chat UI is enabled)
- Configure your AI provider in Settings (opens automatically on first use)
- Click "Quick Connect" to connect to Ableton Live
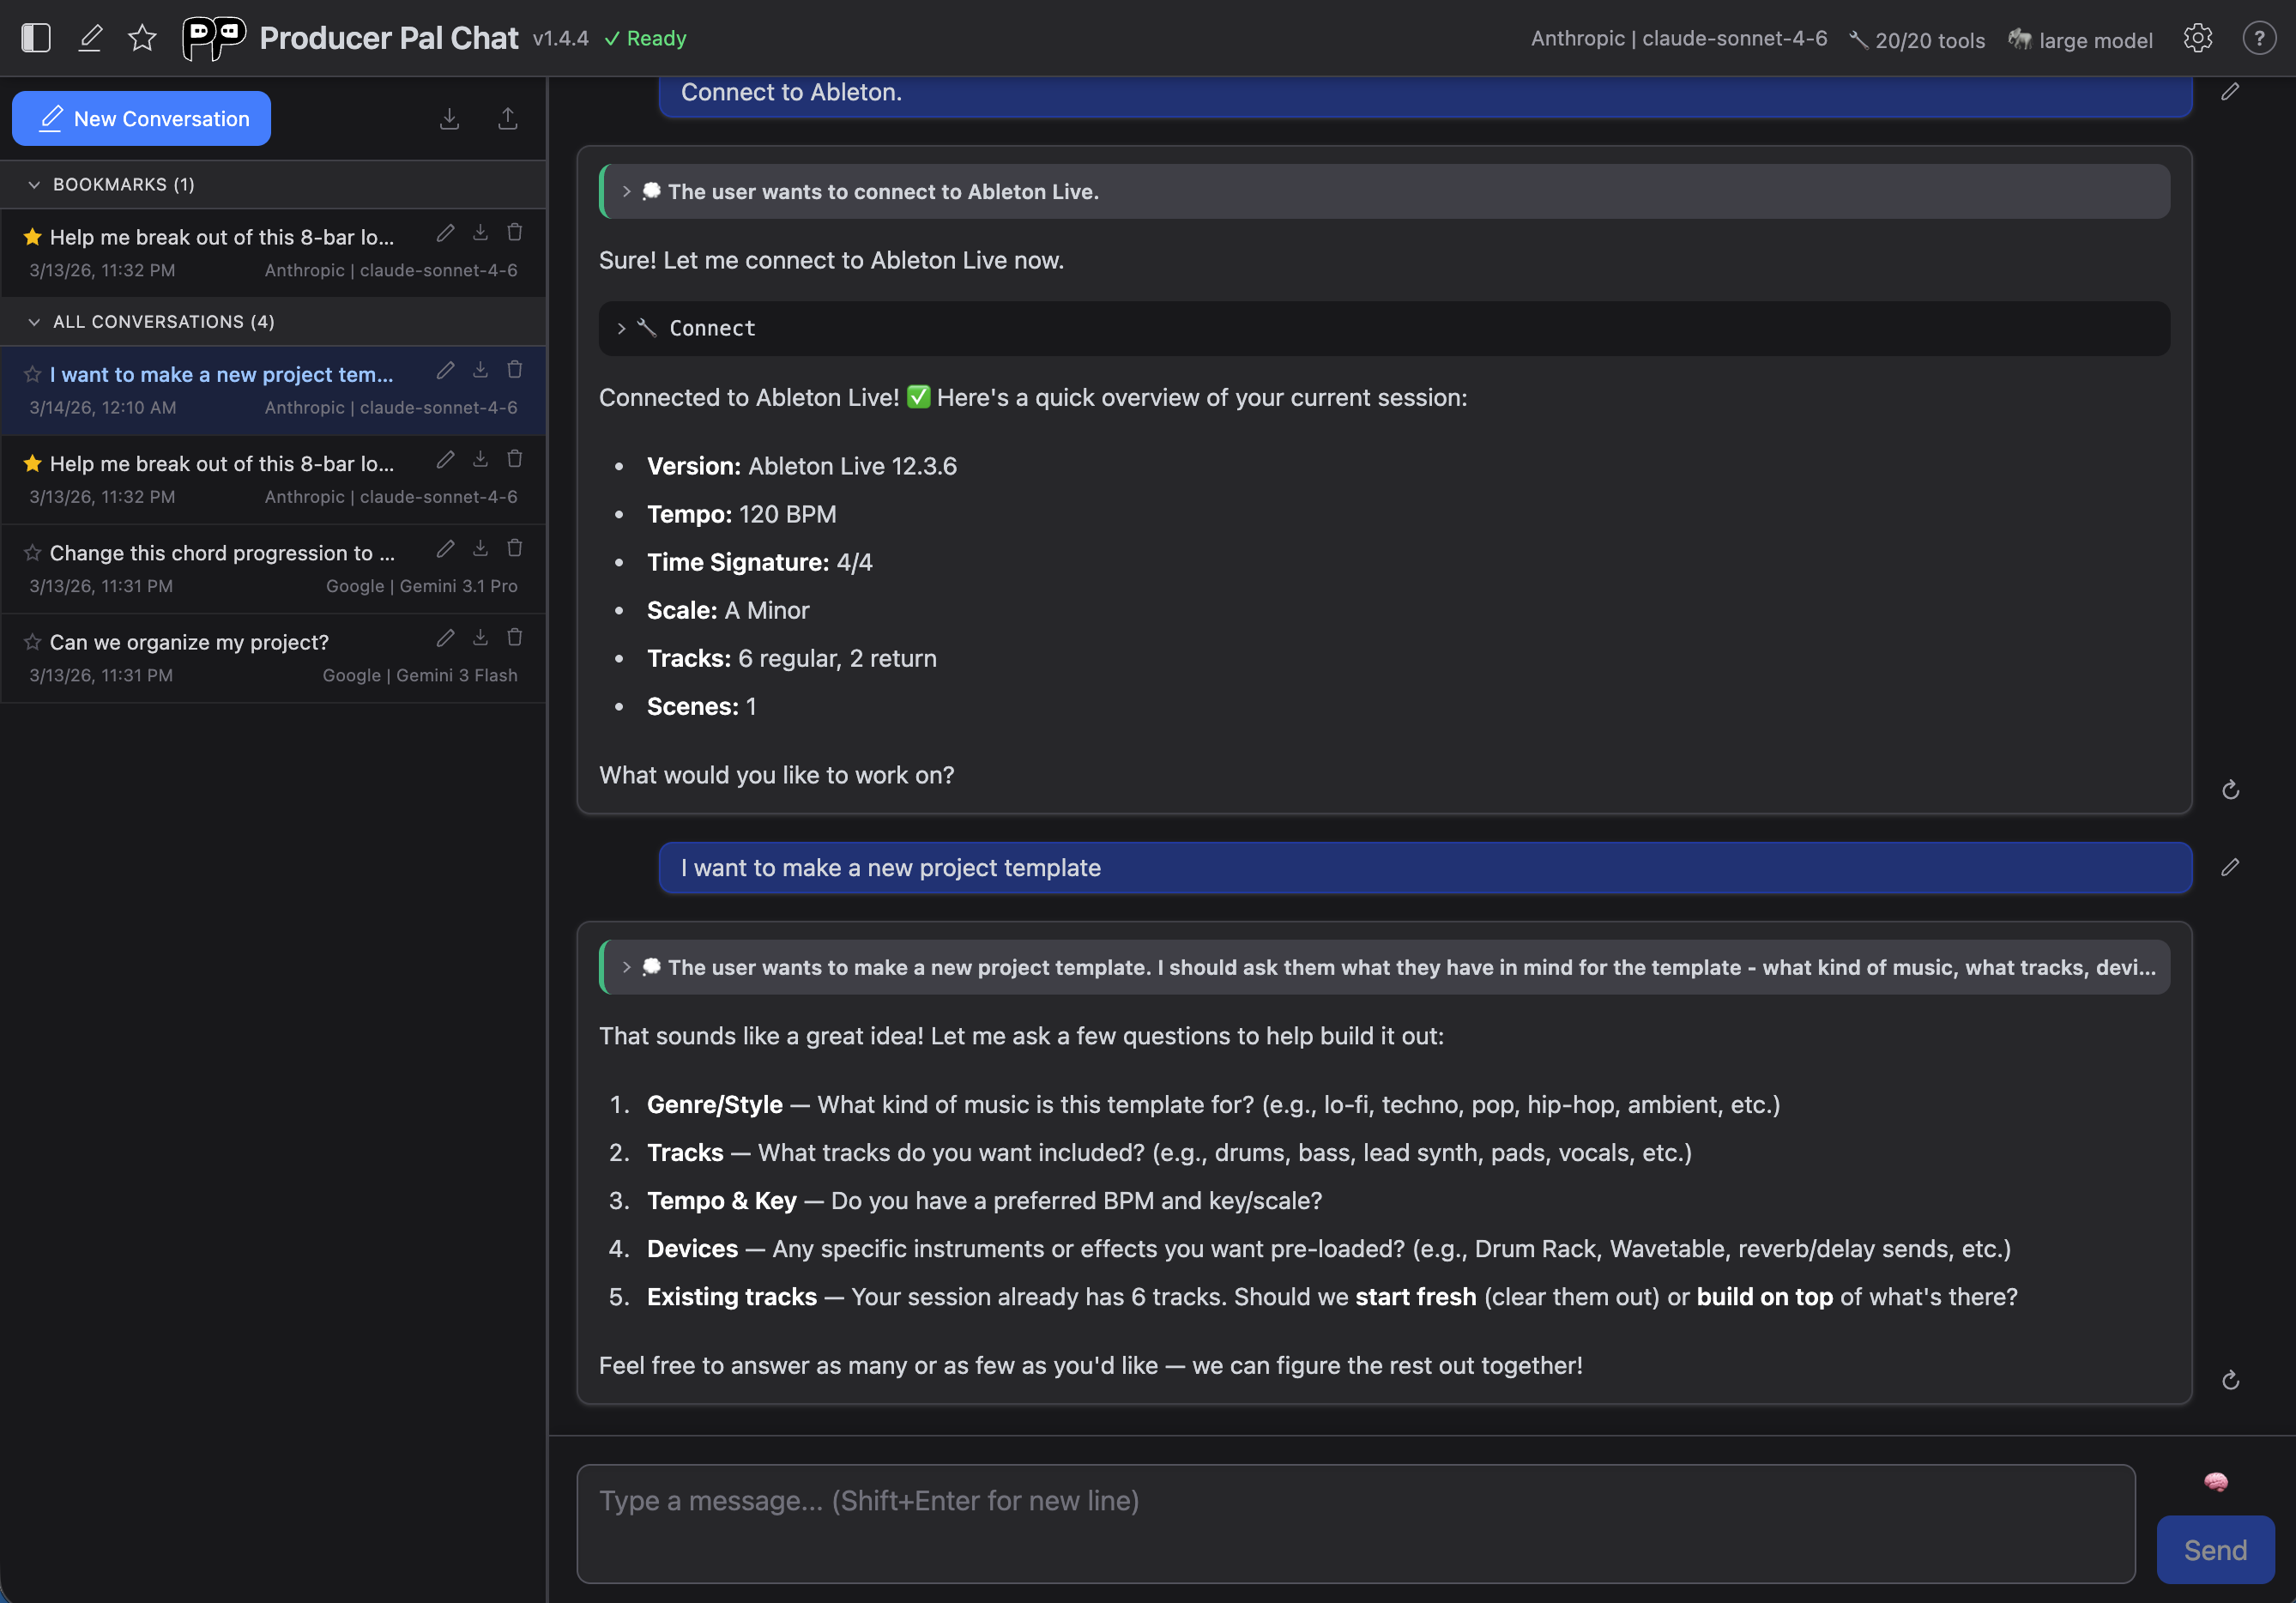
Header Bar
The header is organized into two areas:
Left

- History panel - Toggle the conversation history sidebar
- New conversation - Start a fresh conversation
- Bookmark star - Pin the active conversation
- Logo, title & version - Shows an "update" link when a newer version is available
- Connection status - Shows "Ready" when connected to Ableton
Right

- Provider & Model - Click to open connection settings
- Tools count - Click to open tools settings
- Model size - Shows "large model" or "small model" mode
- Project context - Open the project memory editor in a larger view. Press the close (✕) button to return to the chat
- Settings gear - Open settings dialog
- Help (?) - Link to documentation
Conversation History
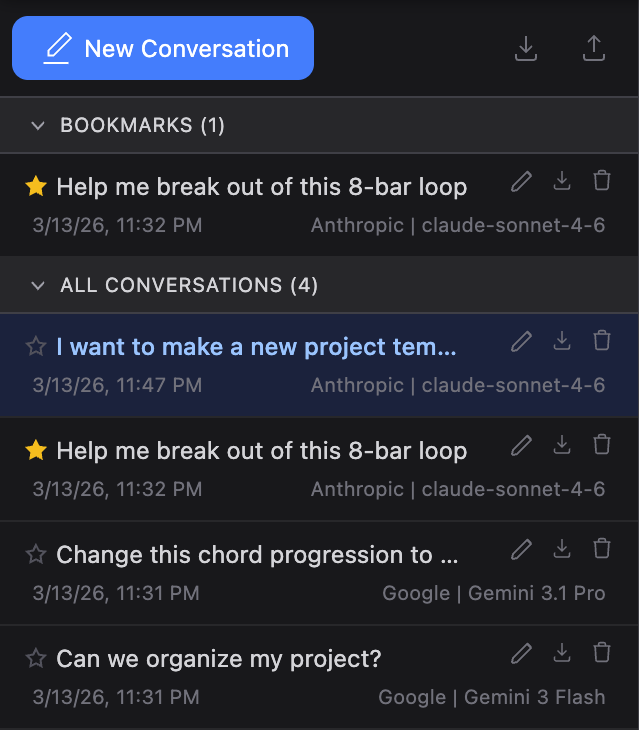
Toggle the history panel using the panel icon in the header. On mobile it takes the full width; on larger screens it appears as a sidebar.
Bookmarks
Star a conversation to pin it to the Bookmarks section at the top of the list. Bookmarked conversations are never auto-deleted when the storage limit is reached. You can toggle the bookmark from the header star icon or from the conversation row.
Managing Conversations
Each conversation in the list has action buttons that appear on hover:
- Rename - Click the pencil icon to edit the title inline (Enter to save, Escape to cancel)
- Export - Download a single conversation as a JSON file
- Delete - Remove the conversation from history
Conversations are stored in your browser's built-in database (IndexedDB), and settings (including API keys) are stored in local storage. This means all your data lives in that specific browser and user profile — it won't be available if you switch browsers or profiles. Use Export & Import to move conversations between browsers.
Up to 200 conversations are kept; when the limit is reached, the oldest non-bookmarked conversations are automatically removed.
Export & Import
The toolbar at the top of the history panel has buttons to:
- Export all - Download all conversations as a single JSON file
- Import - Load conversations from a previously exported JSON file. New conversations are added and existing ones are updated if the imported version is newer
A notification banner confirms the result of each operation.
Conversations
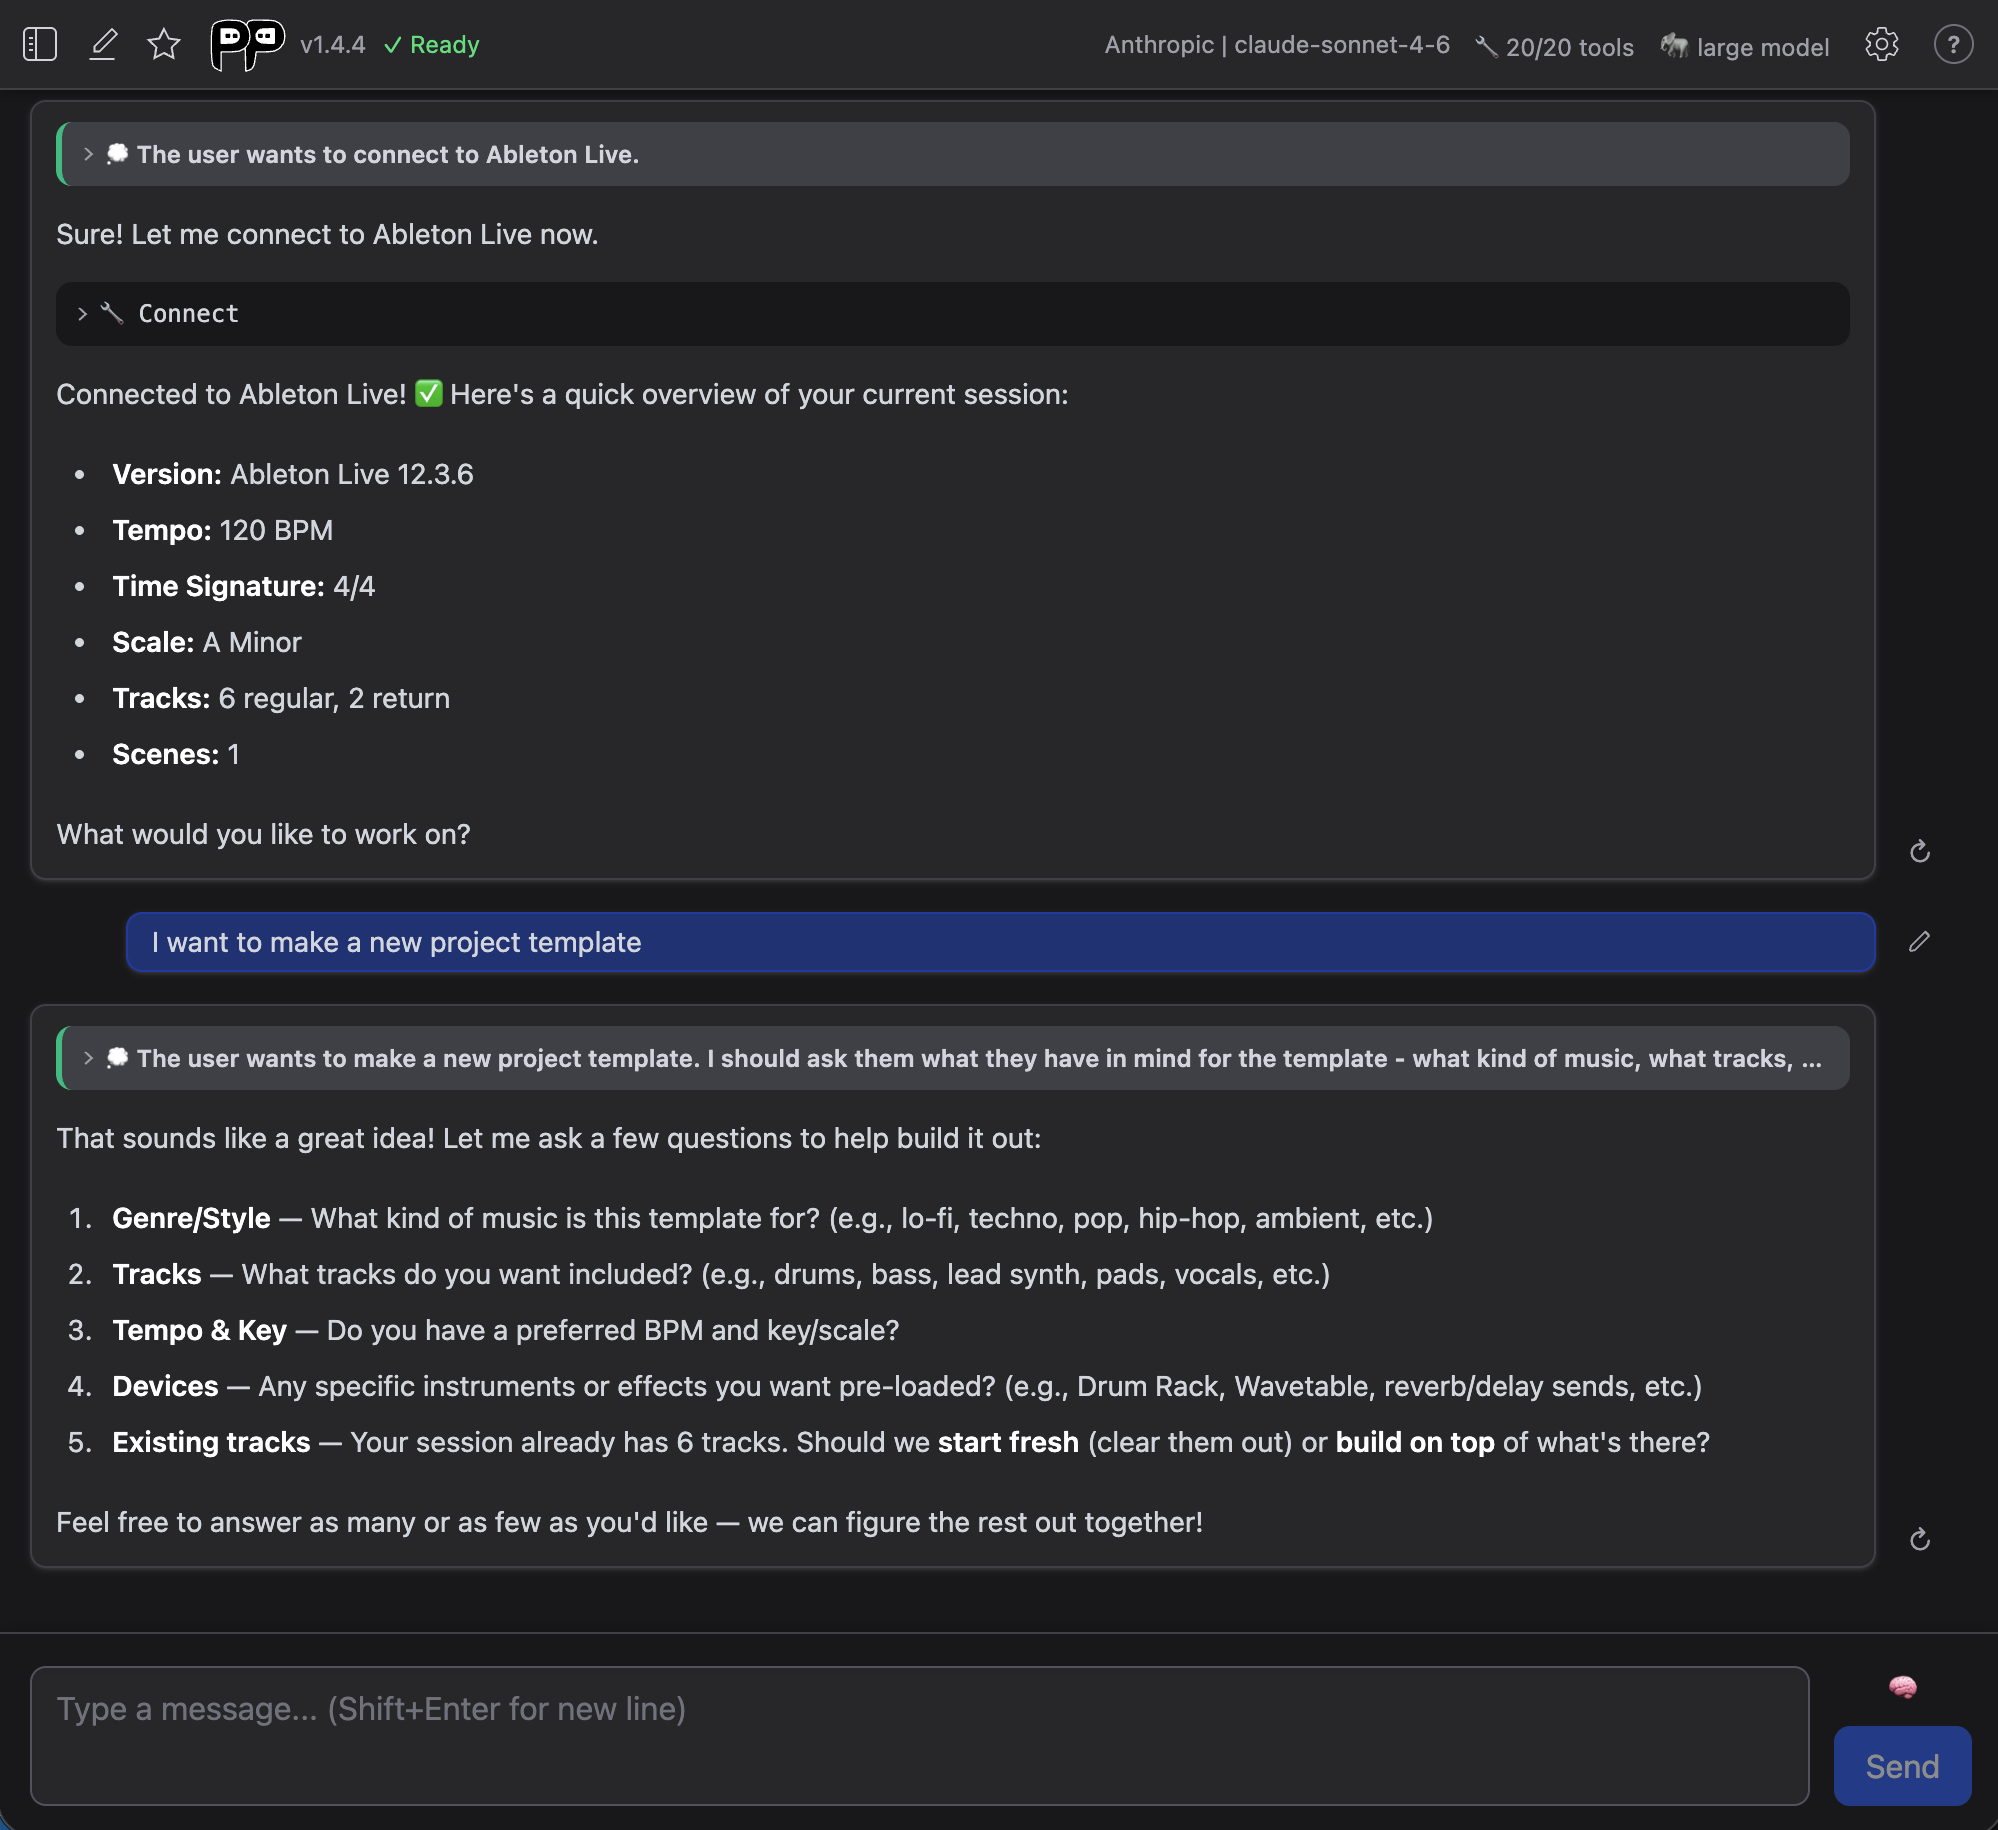
During conversations, you'll see:
- Your messages - What you typed
- AI responses - Results and suggestions from the AI
- Tool usage - Collapsed indicators when AI uses Producer Pal tools
- AI thinking - Expandable sections showing AI's reasoning process (only appears for some AI models)
Expandable Thoughts
Some AI models output "thoughts". When they do, you can click "Thought about:" sections to see the AI's reasoning process:

Editing, Retrying & Branches
You can revise a conversation without losing where it was:
- Edit a message you sent — hover over it and click the pencil icon, change the text, and send.
- Retry an AI response — click the ↻ icon to generate a different response.
Either action branches the conversation: Producer Pal keeps the original and starts a new version from that point forward, so the path you came from is never lost. When a turn has more than one version, ‹ n/m › arrows appear beneath it (for example, "2 / 2") — under the edited message for an edit, or under the response for a retry. Click them to move between versions — the conversation switches to that branch and scrolls to the point where it diverged.
All branches of one conversation share a single entry in the history panel (showing the most recently used version), so branching often won't clutter your history.
Message Input
Thinking Toggle
The thinking toggle next to the text area controls how much reasoning effort the AI uses for the next message. Click it to cycle through three levels:
 **Off** - No thinking
  **Default** - Let the AI decide
  **Max** - Maximum thinking effort
The default thinking level for new conversations is set in Connection settings. The toggle in the message input area overrides it for individual messages.
Text Area & Send
- Text area - Type your message (Shift+Enter for new line)
- Send / Stop - Send your message, or stop a response in progress
Message Queue
You don't have to wait for the AI to finish. Keep typing and pressing Send while it's working and your messages line up in a queue, shown as faded bubbles at the end of the conversation. Each one has an ✕ to remove it before it's sent.
When the current response finishes, the queued messages are sent together as your next turn, in the order you added them. Queuing a message can also interrupt a long, tool-heavy response so the AI gets to what you said next sooner.
Pressing Stop clears the queue along with the response in progress. If a response fails, your queued messages are kept (not lost) and go out with your next send.
Voice Mode
Producer Pal includes an experimental hands-free voice mode for talking with the AI out loud. It's available on two providers, each requiring that provider's API key:
- OpenAI — the GPT Realtime 2 (Voice) model
- Google — the Gemini 3.1 Flash Live (Voice) model
To enter voice mode, open Settings, set the Provider, and select that provider's voice model. The chat composer is replaced by the voice controls described below. See Voice settings for the voice, volume, turn-detection, and (OpenAI only) speed options.
Voice works in Chrome and other Chromium browsers like Edge (Edge is untested but likely fine). Firefox can't drive OpenAI's voice transport, but the Google (Gemini) voice model works in Firefox.
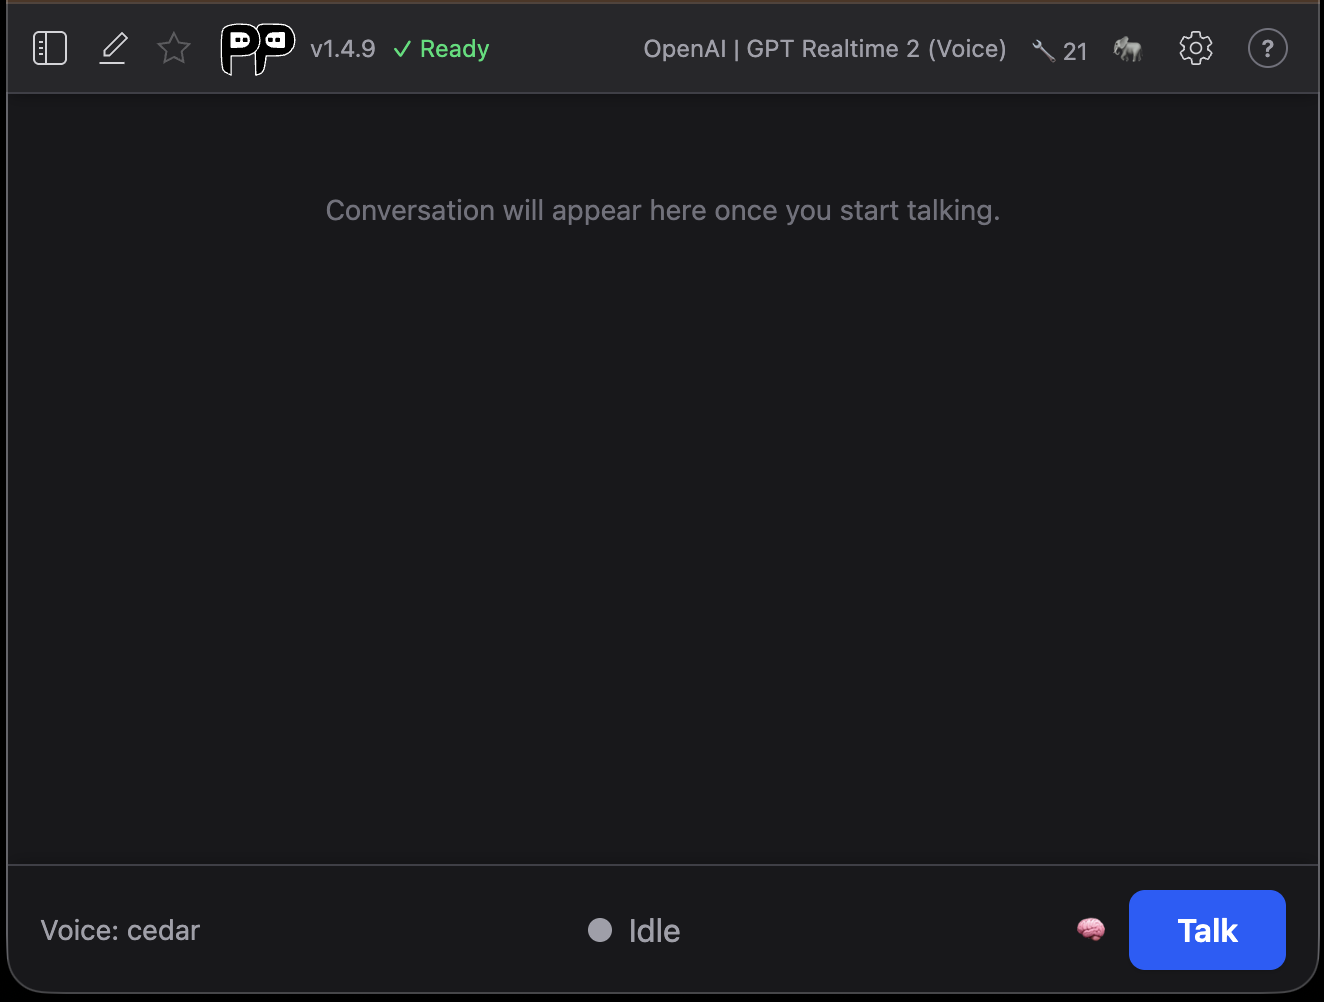
Talking with the AI
The control bar at the bottom of the voice screen works like the chat composer, but for speech:
- Talk / Stop - The first click connects to Ableton and opens your microphone; Stop ends the session. Edits to voice settings apply on the next Stop → Talk.
- Status indicator - A colored dot and label show the current state:
- Listening — go ahead (green) - The session is live and your mic is open; start speaking.
- Thinking — wait (yellow) - The model is preparing a response.
- Assistant speaking — wait (amber) - The assistant is talking.
- Plus Connecting…, Muted, Idle, and Error for the other states.
- Mute / Unmute - Appears while connected and listening. Mutes your microphone without ending the session.
- Interrupt - Appears while the assistant is thinking or speaking. Cuts off the current response so you can take over (the transcript so far is kept). To interrupt by simply speaking instead, enable barge-in.
- Voice label - Shows the active voice. It turns amber when you change the voice in settings mid-session, as a reminder that the change applies on the next Stop → Talk.
- Thinking toggle - The same per-session reasoning-effort control as in chat.
Transcript
A running transcript appears above the controls, styled like a chat conversation. It is read-only — past spoken turns can't be edited or retried, since the audio isn't kept. Voice conversations are saved to history alongside chat conversations, so you can revisit them later.
Rate limits
If OpenAI rate-limits your account mid-session, an error banner shows a countdown and a Retry button that activates once the limit clears.
Hitting rate limits?
Voice sessions re-send the full conversation context — including Producer Pal's skills and tool definitions — to the model on every turn, so a context-heavy session can reach rate limits sooner. If you run into limits, try enabling Small model mode: it loads a compact skill set and trims tool descriptions, substantially shrinking what's sent each turn. The tradeoff is that it's a global setting (it also applies to text chat) and reduces some tool detail, so leave it off unless you need it.
Settings
Settings open as a modal overlay. Press Escape or click outside to close (if there are unsaved changes, the dialog will shake as a reminder to save or cancel).
Settings are stored in your browser so you don't have to redo the setup every time. If entering an AI cloud provider's API key concerns you, use a private browser or clear your settings after use.
When an active conversation was started with a different model or provider than the current defaults, a notice appears indicating that changes apply to new conversations only.
For more information about how to configure specific AI providers, see the installation guide for AI with the chat UI.
Connection
The Connection tab is where you choose and configure your AI provider and model:
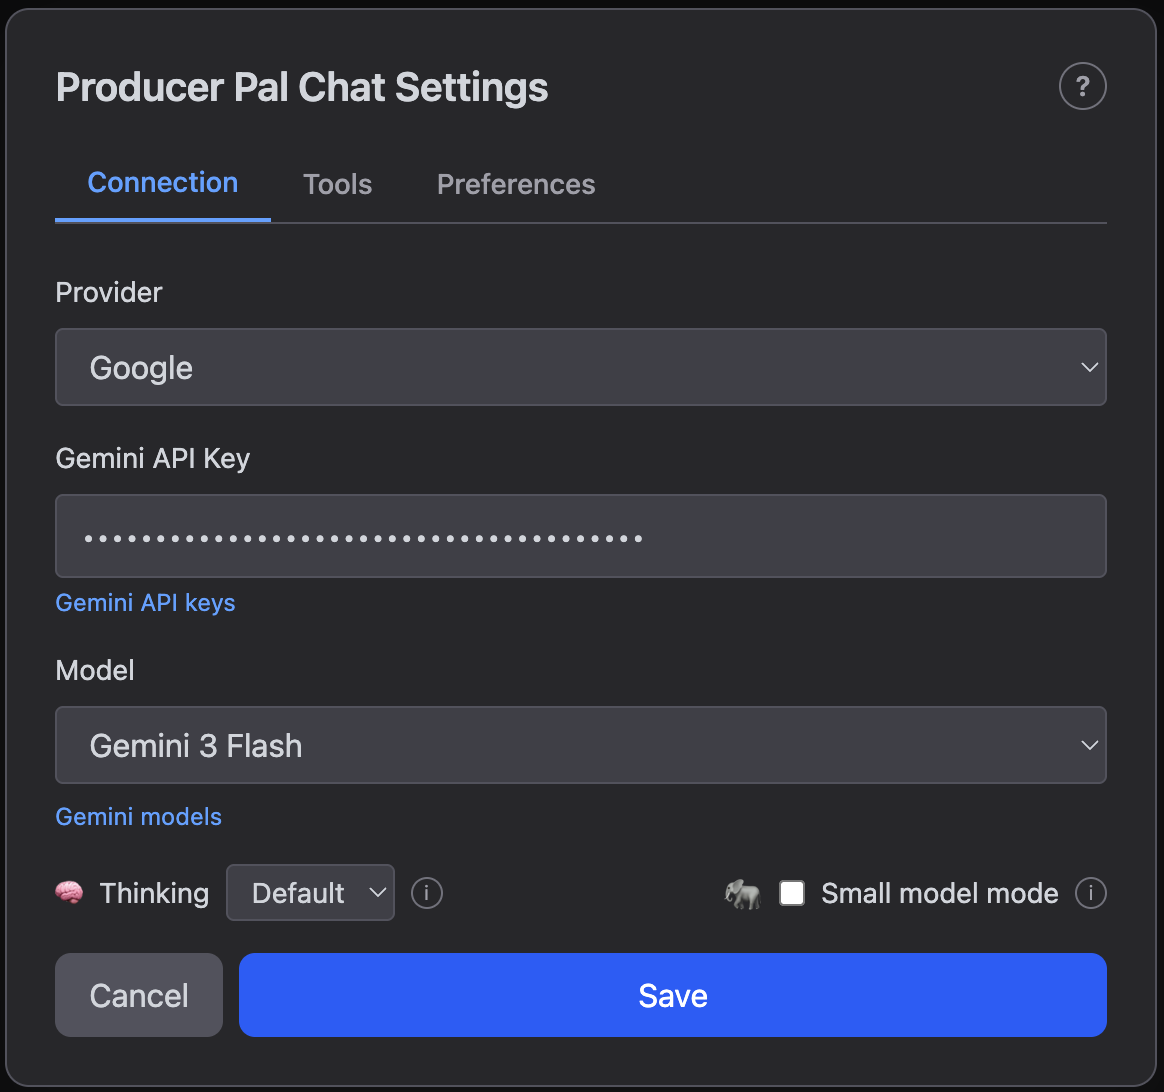
- Provider - Choose from Google, Mistral, OpenAI, Anthropic, Ollama (local), LM Studio (local), OpenRouter, or Custom
- API Key - Your API key (for cloud providers)
- Test Connection - Verify your provider settings work before saving
- Model - Select a model or enter a custom model name
- Thinking - Default thinking level for new conversations (Off, Default, or Max). Can also be overridden per-message using the thinking toggle in the message input area
- Small model mode - Reduces tool descriptions to save context for local models. Recommended when using Ollama or LM Studio
Local AI settings (Ollama, LM Studio)
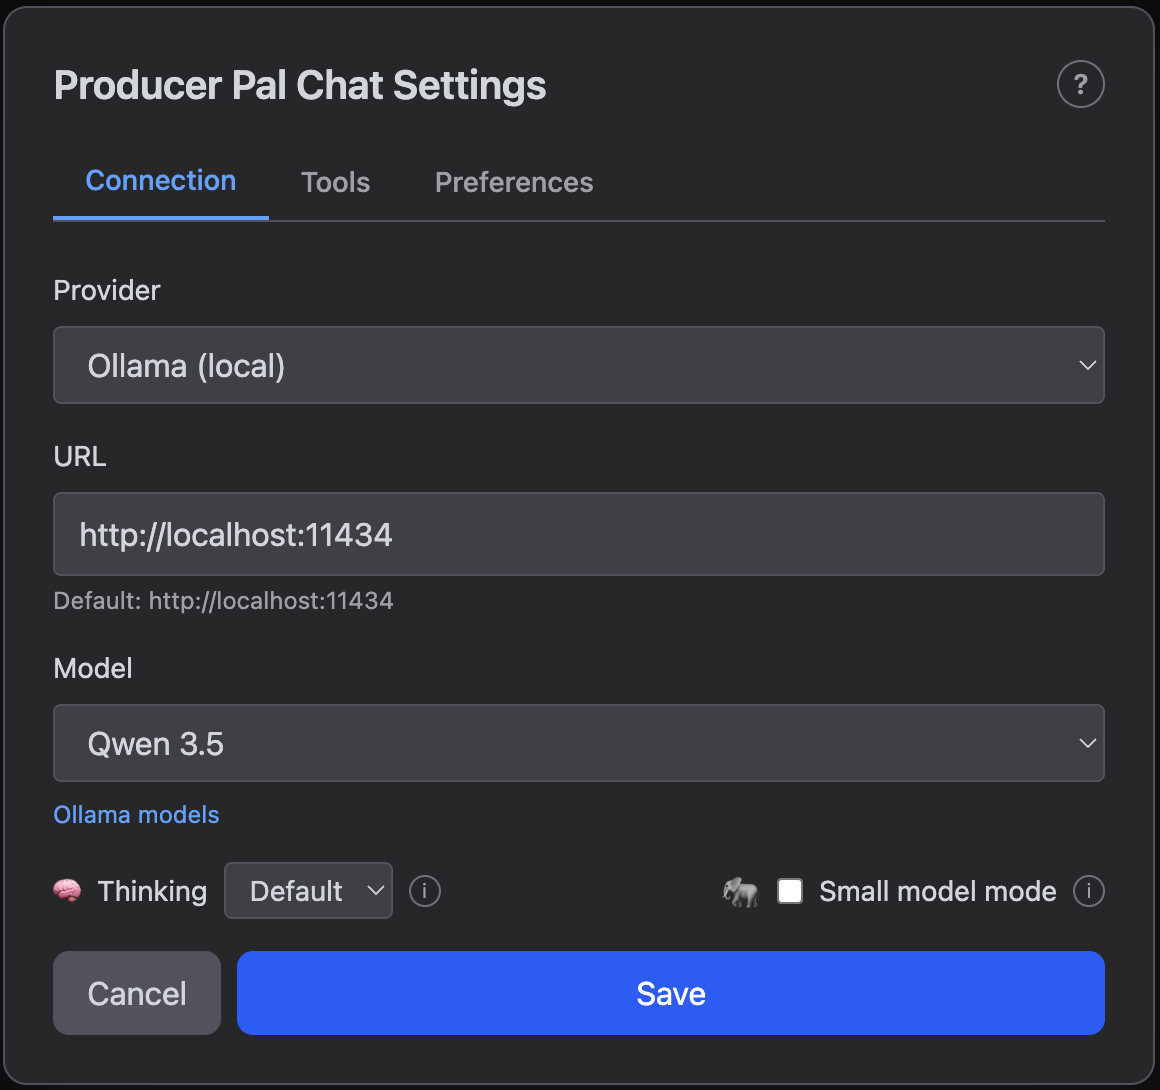
Use Test Connection to confirm your local model server is running and reachable at the configured URL.
Local models, such as those you can run with Ollama, do not require any API keys. Instead, they have a configurable URL.
- URL - Server address (default:
http://localhost:11434for Ollama,http://localhost:1234for LM Studio) - Model - Select from installed models
In most cases, you should use the default URL. This is an advanced configuration option.
You may need to change the URL if:
- You've modified the port in your Ollama or LM Studio installation
- You're running Ollama or LM Studio on a different computer on your local network (or anywhere on the Internet). This allows another computer to handle the resource-intensive language model processing while your main computer focuses on running Ableton Live. Replace
localhostwith the other computer's network address (e.g.,http://192.168.1.100:11434)
Voice
Producer Pal includes an experimental voice mode for spoken conversations with the AI, available on OpenAI and Google (Gemini). To use it, set the Provider and select that provider's voice model on the Connection tab — GPT Realtime 2 (Voice) for OpenAI or Gemini 3.1 Flash Live (Voice) for Google. The Voice dropdown and a collapsible Voice Settings section then appear.
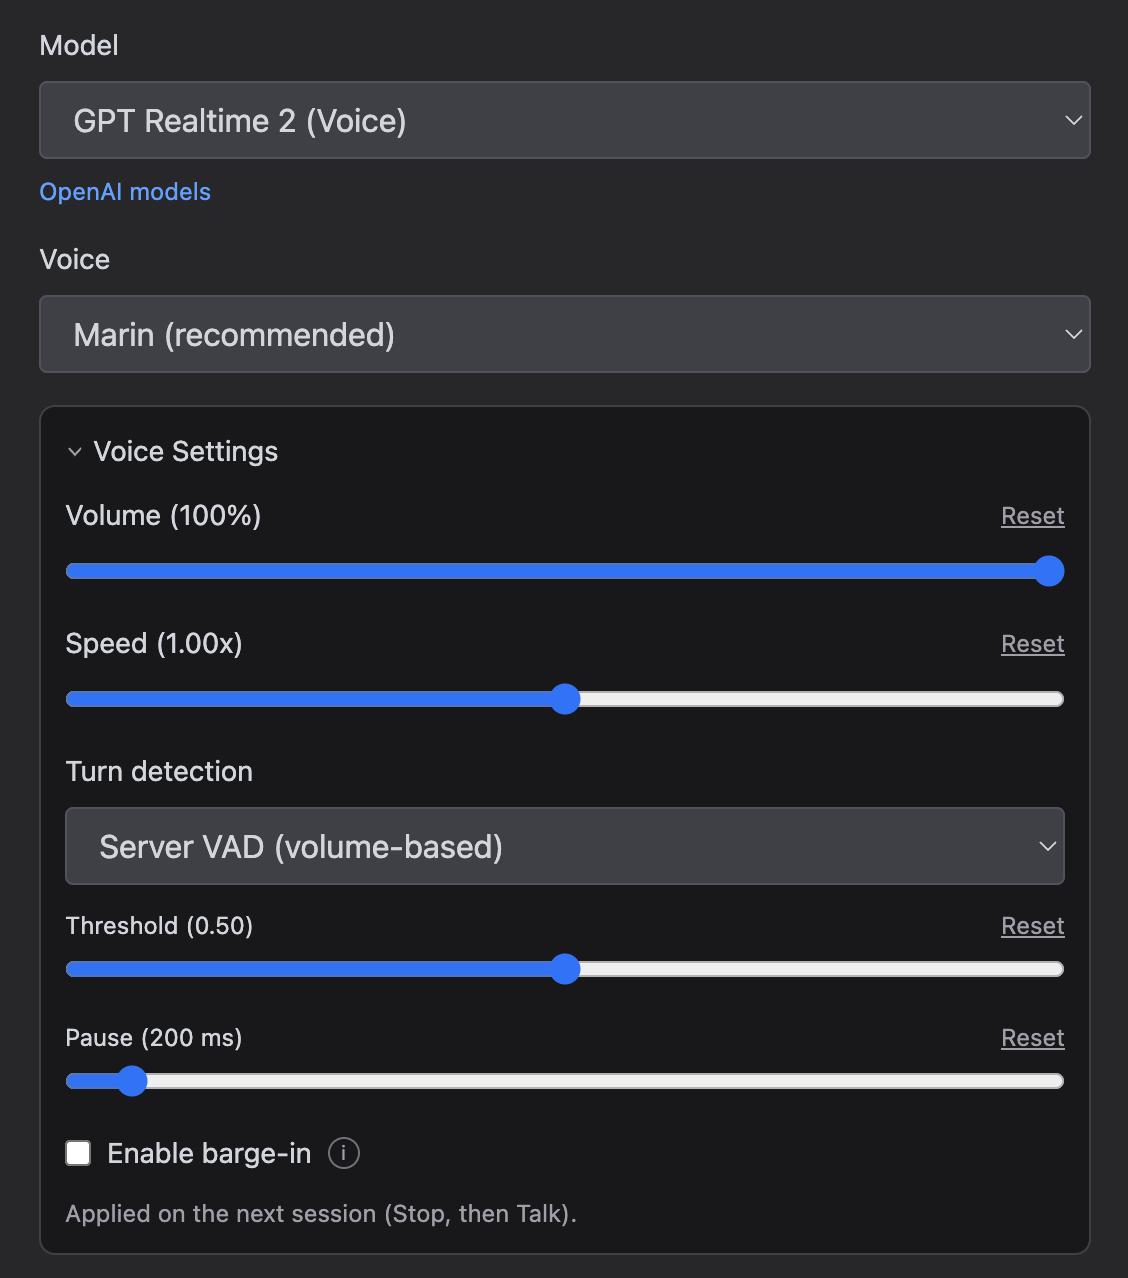
- Voice - The spoken voice the assistant uses; the choices depend on the provider. OpenAI offers Marin, Cedar, Alloy, and more (Marin and Cedar are recommended for the best audio quality); Google offers Puck, Charon, Kore, and more. The voice locks once a session starts talking, so changing it applies on the next session (Stop, then Talk).
Voice Settings
The Voice Settings disclosure groups playback and turn-detection options. Each slider has a Reset link to restore its default. Changes apply on the next session (Stop, then Talk) — except Volume, which takes effect immediately.
Both providers offer volume, turn detection, and barge-in. The turn-detection controls differ because each provider exposes its own voice-activity-detection (VAD) knobs. Speed is OpenAI only (the Gemini Live API has no playback-speed setting).
- Volume - Output loudness of the assistant's voice (0–100%, default 100%). Adjustable live during a session, so you can balance the assistant against the music coming from Ableton without touching Live's mixer.
- Speed (OpenAI only) - Playback speed of the assistant's voice (0.5×–1.5×, default 1.0×).
- Turn detection - How the model decides you've finished speaking — voice activity detection, or "VAD". The controls differ by provider:
- OpenAI picks a VAD mode:
- Server VAD (volume-based) - Detects the end of your turn from audio volume. Adds Threshold (activation volume, 0–1; higher ignores quieter input) and Pause (how long to wait after you stop speaking).
- Semantic VAD (model-based) - The model decides when you've finished a thought. Adds Eagerness (Auto, Low, Medium, or High).
- Google (Gemini) exposes sensitivity and timing directly:
- Start-of-speech / End-of-speech sensitivity - High (detects more readily) or Low.
- Silence - How long (ms) to wait after you stop speaking before ending your turn.
- Prefix padding - How much audio (ms) to keep before detected speech onset.
- OpenAI picks a VAD mode:
- Enable barge-in - When on, speaking interrupts the assistant while it's still talking. Off by default for OpenAI, on by default for Gemini. Use headphones — without them, the assistant's own voice can trigger interruptions.
Tools
The Tools tab controls which tools are available to the AI when using the chat UI. This is important for reducing context size for local models (when using the Ollama or LM Studio provider). For local models, only enable the tools you need. For state-of-the-art cloud providers (Gemini, OpenAI, etc), you generally want to keep everything enabled to make full use of Producer Pal's capabilities. If you want to prevent the AI from using a specific tool, you can disable it here.
Consult the Features page for more info on what each tool does.

The Live API checkbox under Advanced behaves differently from the other toggles. The rest only filter which tools the chat UI's AI can see, but this one mirrors the device's Setup-tab Direct Live API toggle, so enabling it here also turns the tool on at the device level (MCP clients and the REST API will see it too). It is off by default; see Direct Live API for why.
Preferences
The Preferences tab controls visual preferences and conversation management:
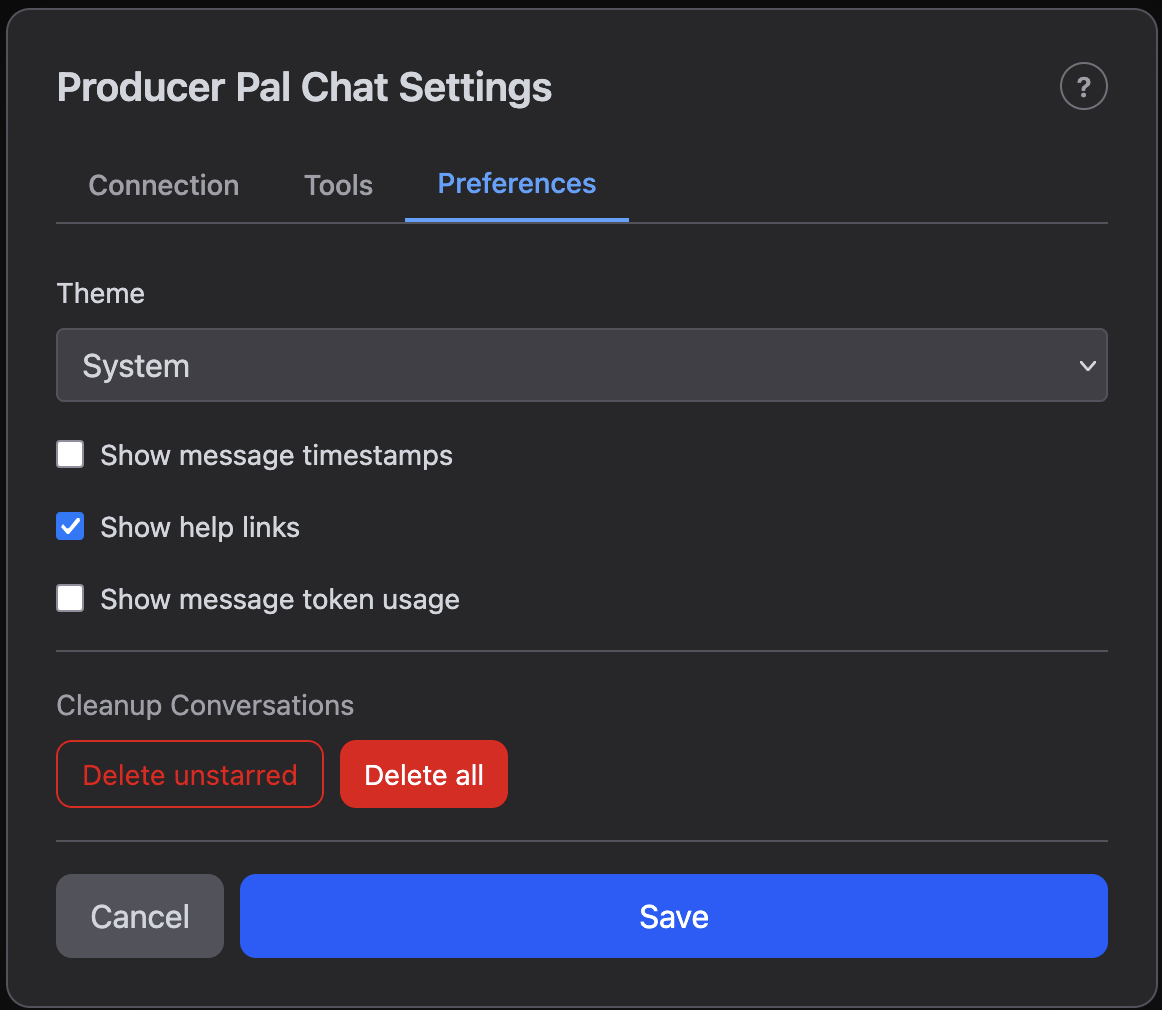
- Theme - Light, Dark, or System (follow your OS preference)
- Show message timestamps - Display the date and time next to each message
- Show help links - Show or hide the documentation help buttons (?) in the header and settings
- Show message token usage - Display token counts after each AI response (see Token Usage below)
- Cleanup Conversations - Bulk-delete conversations:
- Delete unstarred - Remove all non-bookmarked conversations
- Delete all - Remove every conversation
Both delete actions ask for confirmation and cannot be undone.
Token Usage
Tokens are the units AI models use to process text — roughly ¾ of a word on average. Token counts determine API costs and context limits, so tracking them helps you understand how much each conversation consumes.
When "Show message token usage" is enabled in Preferences, each AI response shows a token summary:
tokens: INPUT (NEW new) → OUTPUT (REASONING reasoning)- Input - Total input tokens for this step. Input tokens accumulate across messages because each request includes the full conversation history
- New - How many input tokens are new content compared to the previous step (omitted on the first message)
- Output - Tokens generated by the AI
- Reasoning - Tokens spent on thinking/reasoning, which are a subset of the output token count (only shown when non-zero)
On wider screens, the conversation history sidebar also shows per-conversation token totals in the format tokens: INPUT → OUTPUT, representing cumulative usage across the entire conversation.